Some of my Gear - Sails. (From my old website) rudders electric pumps
In some of the photos on these pages you will notice quite a
few sails.
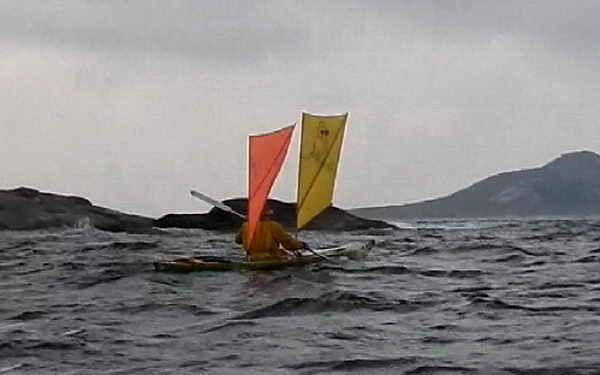
There is absolutely nothing more enjoyable than slipping along under
sail
in a 25 knot breeze - it's magic (it's even better in 40 knots). To
those
of you who don't use sails and rudders, my commiserations - you haven't
lived. (If you want to SEE sails in action, contact Jeff Jennings and
get
hold of his 'A Mission to the Furneaux Islands' video
- this is
basically a 60 minute visual record of our trip to Flinders Island area
in 1995, where we sailed in 30 and 40knot winds.) A small part of it is online here:
Sea kayak sailing video by Jeff Jennings
I have recently had quite a few enquiries as to the size and shape of these sails, and have endeavoured to give these here. If you click on a sail you see on this page it will take you to a drawing of same.
Some of these sails are made out of very light sail cloth (rip-stop nylon - from a fabric shop), some are just shower curtain material. The end of the batten and boom pockets need to be reinforced strongly, otherwise the batten ends up poking through. The aluminium mast also fits in a pocket the full length of the sail, the sail stays permanently on the mast. NOTE: To let the sail fold up properly, this pocket needs to be a very tight fit from the top of the mast down to the batten (so the sail does not tend to slide off the mast). From there down to the bottom the pocket needs to be slightly looser, so that the bottom of the sail can slide up the mast about a centimetre as the top batten is folded against the mast when you put it away.
A hem is sewn along the outside of the sail from the top of the mast to the end of the batten, and then down to the end of the boom. This hem has a very light cord threaded through it and allows some adjustment of 'shape'.
The mast (3/4 inch aluminium) has about 70cm of tight fitting wooden dowell glued inside the bottom end to help stop it bending in strong winds. The top end of the mast is closed off with a rounded wooden plug, as is both ends of the boom. Check that the whole thing floats when finished - you may need lighter battens, or even replace the top batten with 10mm aluminium tube the same as the boom. If you capsize with the sail up (extremely rare) then you just reach forward and pull the mast out of the deck, and then roll up.
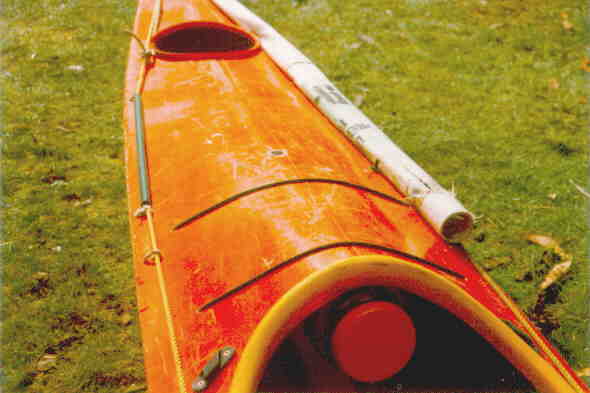
The sail is kept in a long vinyl tube along the front deck of the kayak, with a piece of plastic pipe sewn into the end near the cockpit to keep the tube open. This lets you slip the sail away with one hand, bottom end of the mast first.
Shows mast step (as far forward as is still
comfortable to put
mast in and out.
Shows sail holder (or sail tube).
The sheet (cord from the boom) goes under the front piece of shockcord and back to one of the jam cleats. The cleats are positioned so that the sail can be sheeted in hard across the opposite side of the deck when going into the wind. Not that you use it going into the wind very much - but there are the odd times. It is better to have a cord across the deck, as well as the shockcord. The shockcord is for maps, the cord to run the sheet under. This keeps the sheet out of the way when paddling.
The fitting in the deck that the mast stands in is a 5 inch piece of aluminium or plastic tube glassed through the deck (and strongly reinforced). Don't make this too neat a fit, as a slight amount of sand in it will jam the mast solid. This position of the fitting in the deck will obviously vary from boat to boat, depending on the reach of the paddler. It needs to be as far forward as possible, and still be able to reach it to pull the mast out when the wind is fairly strong, or when you are upside down (so you can roll up).
The dimensions on my kayaks are as follows: The front sail fitting is 1 metre in front of the back of the seat (where your bum goes). I say the back of the seat, because there are many different size cockpits, so these are not a reasonable thing to give measurements from. I have a low cord across the front deck for the cord of the sail to come under, and then it feeds back into a jam cleat. This cord across the deck is 680 mm in front of the back of the seat, and extends the full width of the kayak. This keeps the sail and cord out of the way for paddling.The rear sail fitting is 200 mm behind the back of the seat.
You may well hear that people have fitted 'Tasmanian' type sails but had to modify them so as to be able to paddle. Obviously these people only think they have fitted Tasmanian sails and fittings - because I have been using these for over 20 years, and they in no way interfere with your paddling. In fact this reminds me of a paddler who came to Fiji with us in 1984. He had borrowed a Tasmanian fitted kayak from a friend in Sydney, and religiously copied everything to fit to his own sea kayak. When we got to Fiji I was looking at his kayak for the first time, and asked him why he had omitted a small nylon fitting on the rudder that the up/down cords go through. He said he couldn't see that it did anything so omitted it. I suggested he go out on the water and turn his rudder 10 or 15 degrees, and then raise and lower his rudder. He did this, and then returned to shore, saying he could now see why that nylon fitting was necessary. His cord had dropped off the side of his rudder blade.
We have spent over 20 years designing and using a lot of the gear we use in Tasmania, but we still get people who make a half-hearted copy, and redesign all the faults back into the gear that we have spent so much time in getting rid of. I recently saw a website in the USA which claim the steering wires on the rudder will eventually break because of the constant bending. This was the first fault we designed out of rudders, but it seems the yanks have now designed it back in again.
The Sea Leopard sail is the smallest sail you should ever use - I really call this a 'training' sail. After a bit of practice you will want a much bigger one - or fit another one behind the seat.
This is Jeff Jenning's Greenlander.
This is my Sea Leopard.
This is my Longboat.Laurie Ford.
2016
- This is my current sail that I actually made when in America.
The sails are made from rip stop nylon - readily
available from Jo-Anne
fabrics. We made all four the same size.
I start with the fabric cut to a rectangle 31" by 61" (79cm by 155cm). This allows
3 1/2" (9cm) for the pocket to
fit on the mast, and 1
1 /2" (3.8cm) for the hem round the rest of
the sail. You will
end up with a sail 26"(66cm) wide. The pocket for the boom is sewn on
separately.
The boom needs to be angled up to help keep it out of the way
when paddling,
and also to let you look underneath it. Measure about 13" (33cm) up from the
bottom
on one side and draw a line from there to the bottom of the other
side.You
could just cut this triangular piece off, but to get a slightly better
shape to the sail try this. Find the centre of this line and measure
down
at right angles to it - 1 inch (2.5cm). Then try drawing a curve through this
point,
and cut along this curve. Then when the straight boom pocket is sewn on
you will have a bit of 'belly' in the sail.
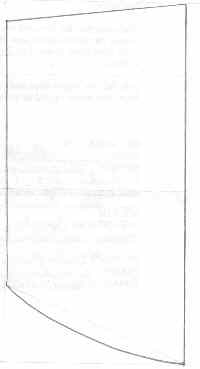 I have exaggerated the
curve here to make it clear.
I have exaggerated the
curve here to make it clear.
I also measure 3" (7.6cm) down from the top on the same side and cut that
triangular
piece off as well - otherwise when you fold the sail up, the batten
will
protrude well above the top of the mast. It will anyway, this just
lessens
it a bit. (In actual fact with the yellow sail I used a much longer
batten,
and did not cut this little piece off the top.)
The fibreglass battens are 39" (99cm) long, but this is not at all critical (the batten on the yellow sail is 55" (140cm) long)
I used 5/8" wooden dowel for the boom, 30" (76cm) long. To stop the wood splitting where the bolt goes through the mast fitting, I glue a short piece of 3/4 inch mast aluminium over it.
Now I am not going to tell you how to sew - you'll have to work that out for yourself. There needs to be a pocket down the side for the mast to fit into - the sail stays permanently on the mast. From the top of the mast down to where the batten is, the pocket should be a very tight fit - you don't want it ever freely sliding off the mast. From there down the pocket needs to be a bit looser, as when you fold the batten against the mast for stowing, the sail will want to slide up the mast slightly. Inside the hem across the top of the sail I attach a thin piece of 'platted builders line'at the mast end. The other end at the top of the batten can be tied to the batten to prevent this top hem stretching, and altering the set of the sail. To attach the boom and batten to the mast bend an inch wide piece of sheet aluminium round the mast and sail and put a small bolt through the boom (and batten).